Key Takeaways
- Noise is an inherent aspect of photography that can reduce clarity, but it can be minimized through proper technique and understanding.
- Noise in photography comes from various sources, but the key is to focus on the signal-to-noise ratio, ensuring that the signal (desired image) is stronger than the noise.
- Techniques to reduce noise include correctly exposing the image, using a lower ISO, utilizing HDR merging, applying noise reduction in moderation, and using a camera with a larger sensor.
Some embrace noise, some want to get rid of it. No matter what side you’re on, it’s a fact that noise is an effect that reduces the clarity of photos. Almost every camera has the capacity to take minimal-noise photos, and it’s all down to understanding and technique, which you will learn here.
What Is Noise in Photography?
Noise in photography is an ambient, unintentional signal the camera sensor receives. This ambient signal is present in all cameras and is even present in our eyes. Not to be confused with grain, which comes from film; noise is usually most visible when using high ISO settings and brightening dark images.
While you can’t get rid of it completely, you can figure out how to minimize it with proper technique and knowledge.
What Causes Noise in Photography?
Noise is always present; it's just a matter of whether it’s visible or not. There are many sources of noise as well. Some noise can come from the sensor, some from electrical noise, and some from the quantum nature of photons. However, the best way to address noise is to understand the signal-to-noise ratio.
Signal-to-Noise Ratio
Don’t concern yourself with the type of noise, but more with the ratio between the signal (which is the image you want to take) and the noise.
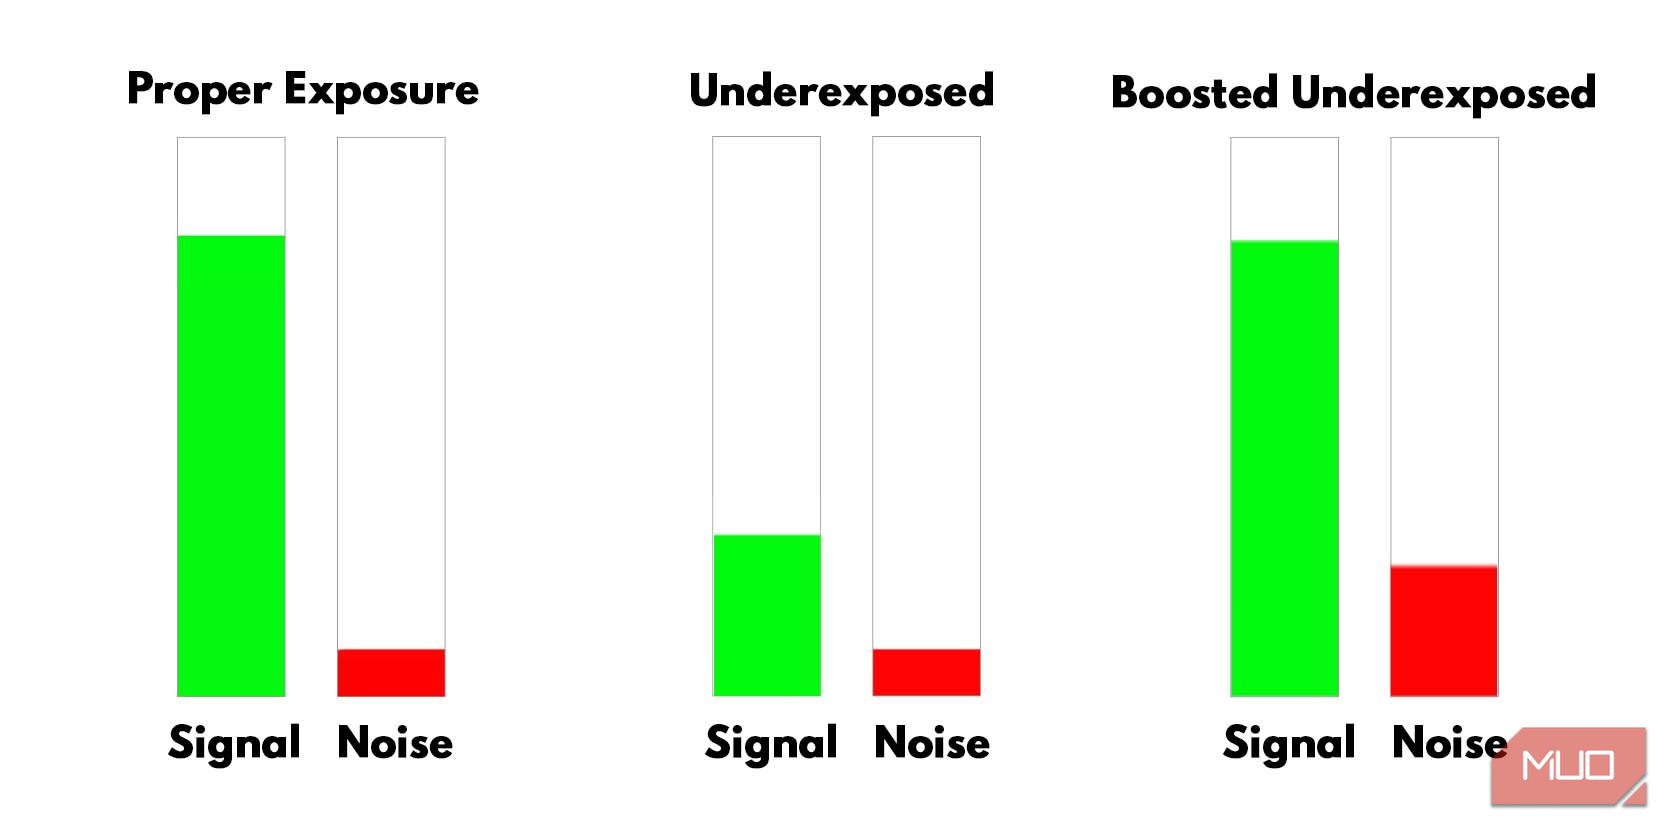
Think of the image signal equally to an audio signal. Visualize it with this signal level bar, the minimum signal would be the noise that you have no control over. The red bars represent the noise, and the green bars represent the signal.
The first pair on the left has low noise and a high signal, the second has a low signal while having the same amount of noise, and the last pair has the signal raised up to make it stronger. As you can see in the last pair, having a low ratio means that you’ll end up raising the noise much more than the properly exposed image.
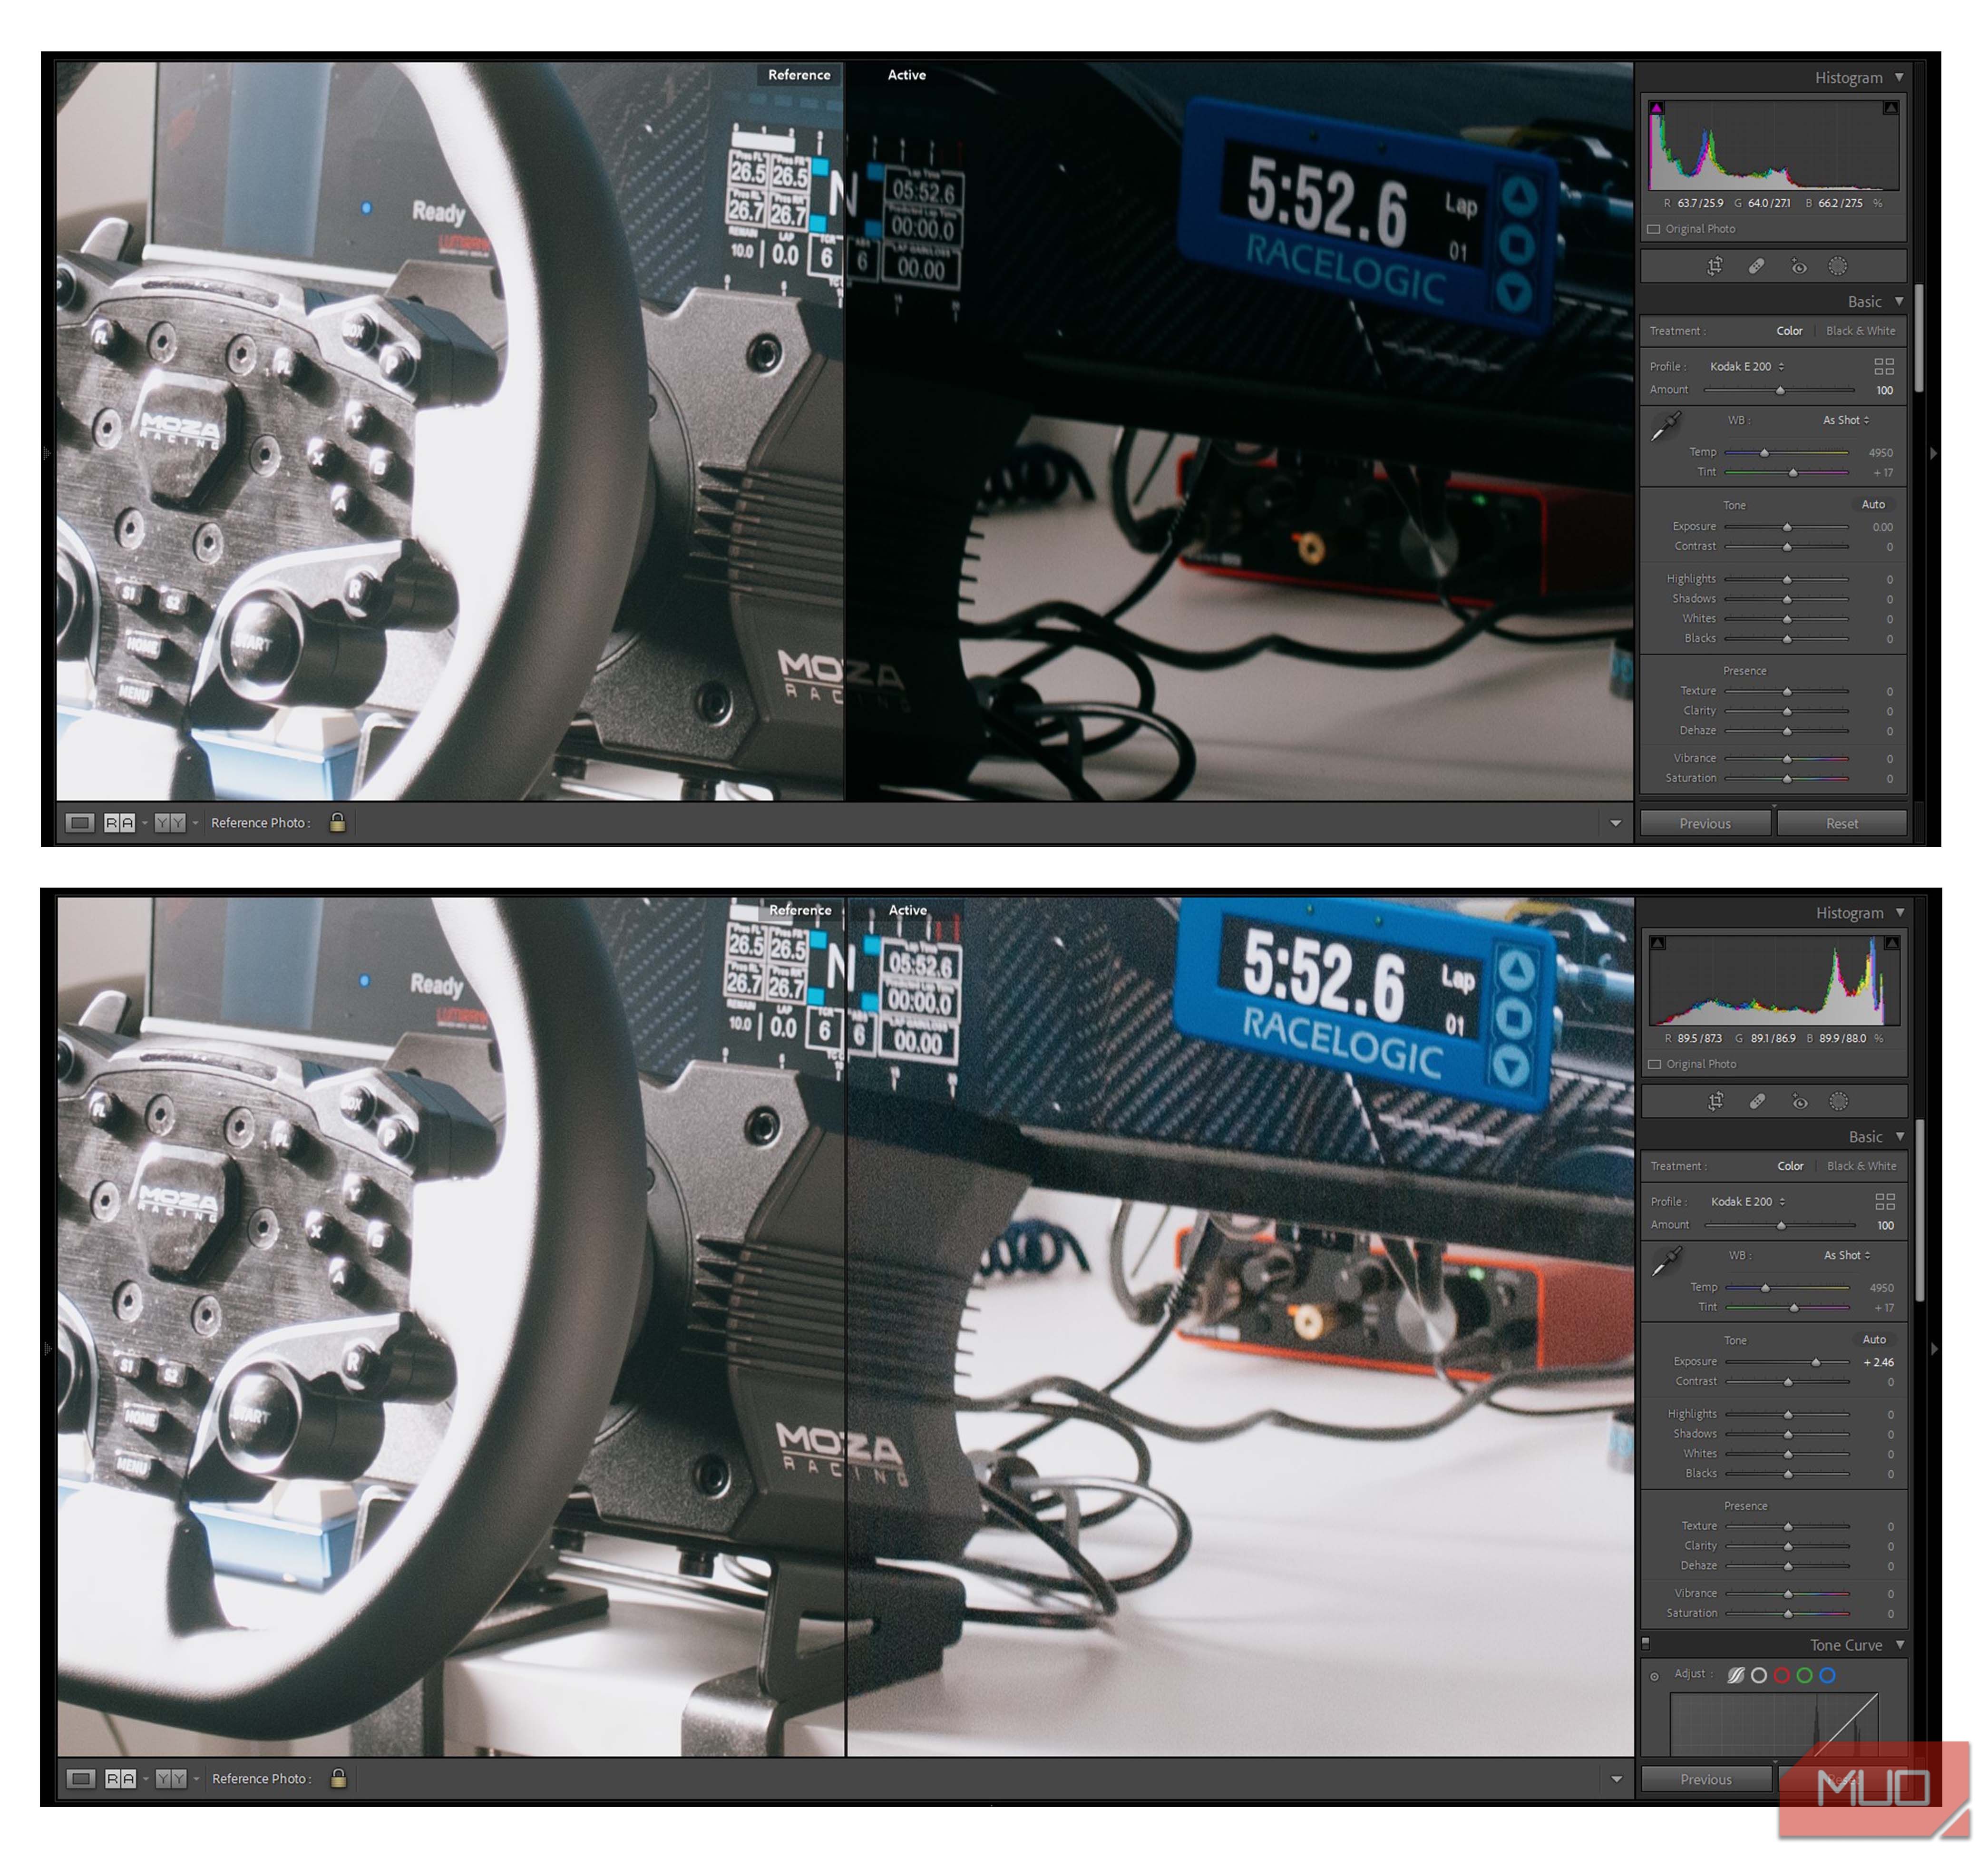
Here’s another example of signal-to-noise ratio in an actual image. These are zoomed in to make it easier to see the noise.
The first image on top is properly exposed, even being overexposed on the bright spots, and the second is underexposed. The image below is a side-by-side of the underexposed image brightened up to match the exposure of the first image. As you can see, there’s a ton of noise as the noise levels go up with the signal by a large amount compared to the properly exposed image.
How to Avoid Noise in Photography
With the visualization we’ve provided above, you’ve learned that you need to increase the ratio between the signal and noise. Here are some techniques to apply it to your photography.
1. Correctly Expose Your Image
The key to getting very little noise in your photos is to simply expose your images properly. Proper exposure will ensure that your signal strength is much higher than the noise, increasing the ratio between noise and signal.
If you don’t have extremely bright spots that will cause clipping, you can even overexpose your images by a little bit to get a stronger signal in the darker areas. You can then bring down the exposure in Lightroom or your photo editor of choice. You’re better off needing to lower the exposure than needing to increase it, as lowering the exposure also lowers the noise.
Exposure isn’t limited to shutter speed, ISO, and aperture. You can use lights, reflectors, a tripod, and even HDR merging to your advantage to get the right exposure.
2. Use a Lower ISO
Higher ISOs raise the electrical noise floor by increasing the voltage in the sensor, making it more sensitive. The advantage is that you won’t need long shutter speeds, but at the cost of lowering the signal-to-noise ratio.
Don’t be scared to raise your camera’s ISO, however. Every camera is different; some camera models have less noise at the same ISO levels as other cameras. We suggest experimenting with your camera and finding the highest ISO settings your camera can still have minimal noise at.
A tripod can help you achieve lower ISO shots since you can safely use longer shutter times. However, if you’re shooting handheld, you should try to aim for the lowest ISO you can shoot at. Around 1/(focal length) as a rule of thumb; 1/40th of a second for a 40mm effective focal length, for example. You can go slower if you’re confident with the stability of your own hands, though.
3. Use HDR Merging
HDR merging is a great post-processing technique to use when you have a scene with light ranges that are beyond your camera’s capabilities. HDR merging is basically taking multiple images with different exposures and merging them together to get the most balanced image.
If you have a scene with an extremely bright highlight that clips out before your camera can expose the darker areas properly, HDR merging is extremely useful. You should check to see if your camera has this function already, but if it doesn't, you can use Lightroom to merge them for you. If you don’t use Lightroom, check out how to create HDR images in Photoshop with Camera RAW.



Take these three images above, for example. The first one has a really bright highlight where detail is lost in those areas, the second one has a balanced exposure, and the last is extremely dark but shows the detail in the highlights. We can then combine these in Lightroom, turn down the highlights, increase the shadows, and extract this perfectly exposed image with minimal noise below.
4. Use Noise Reduction
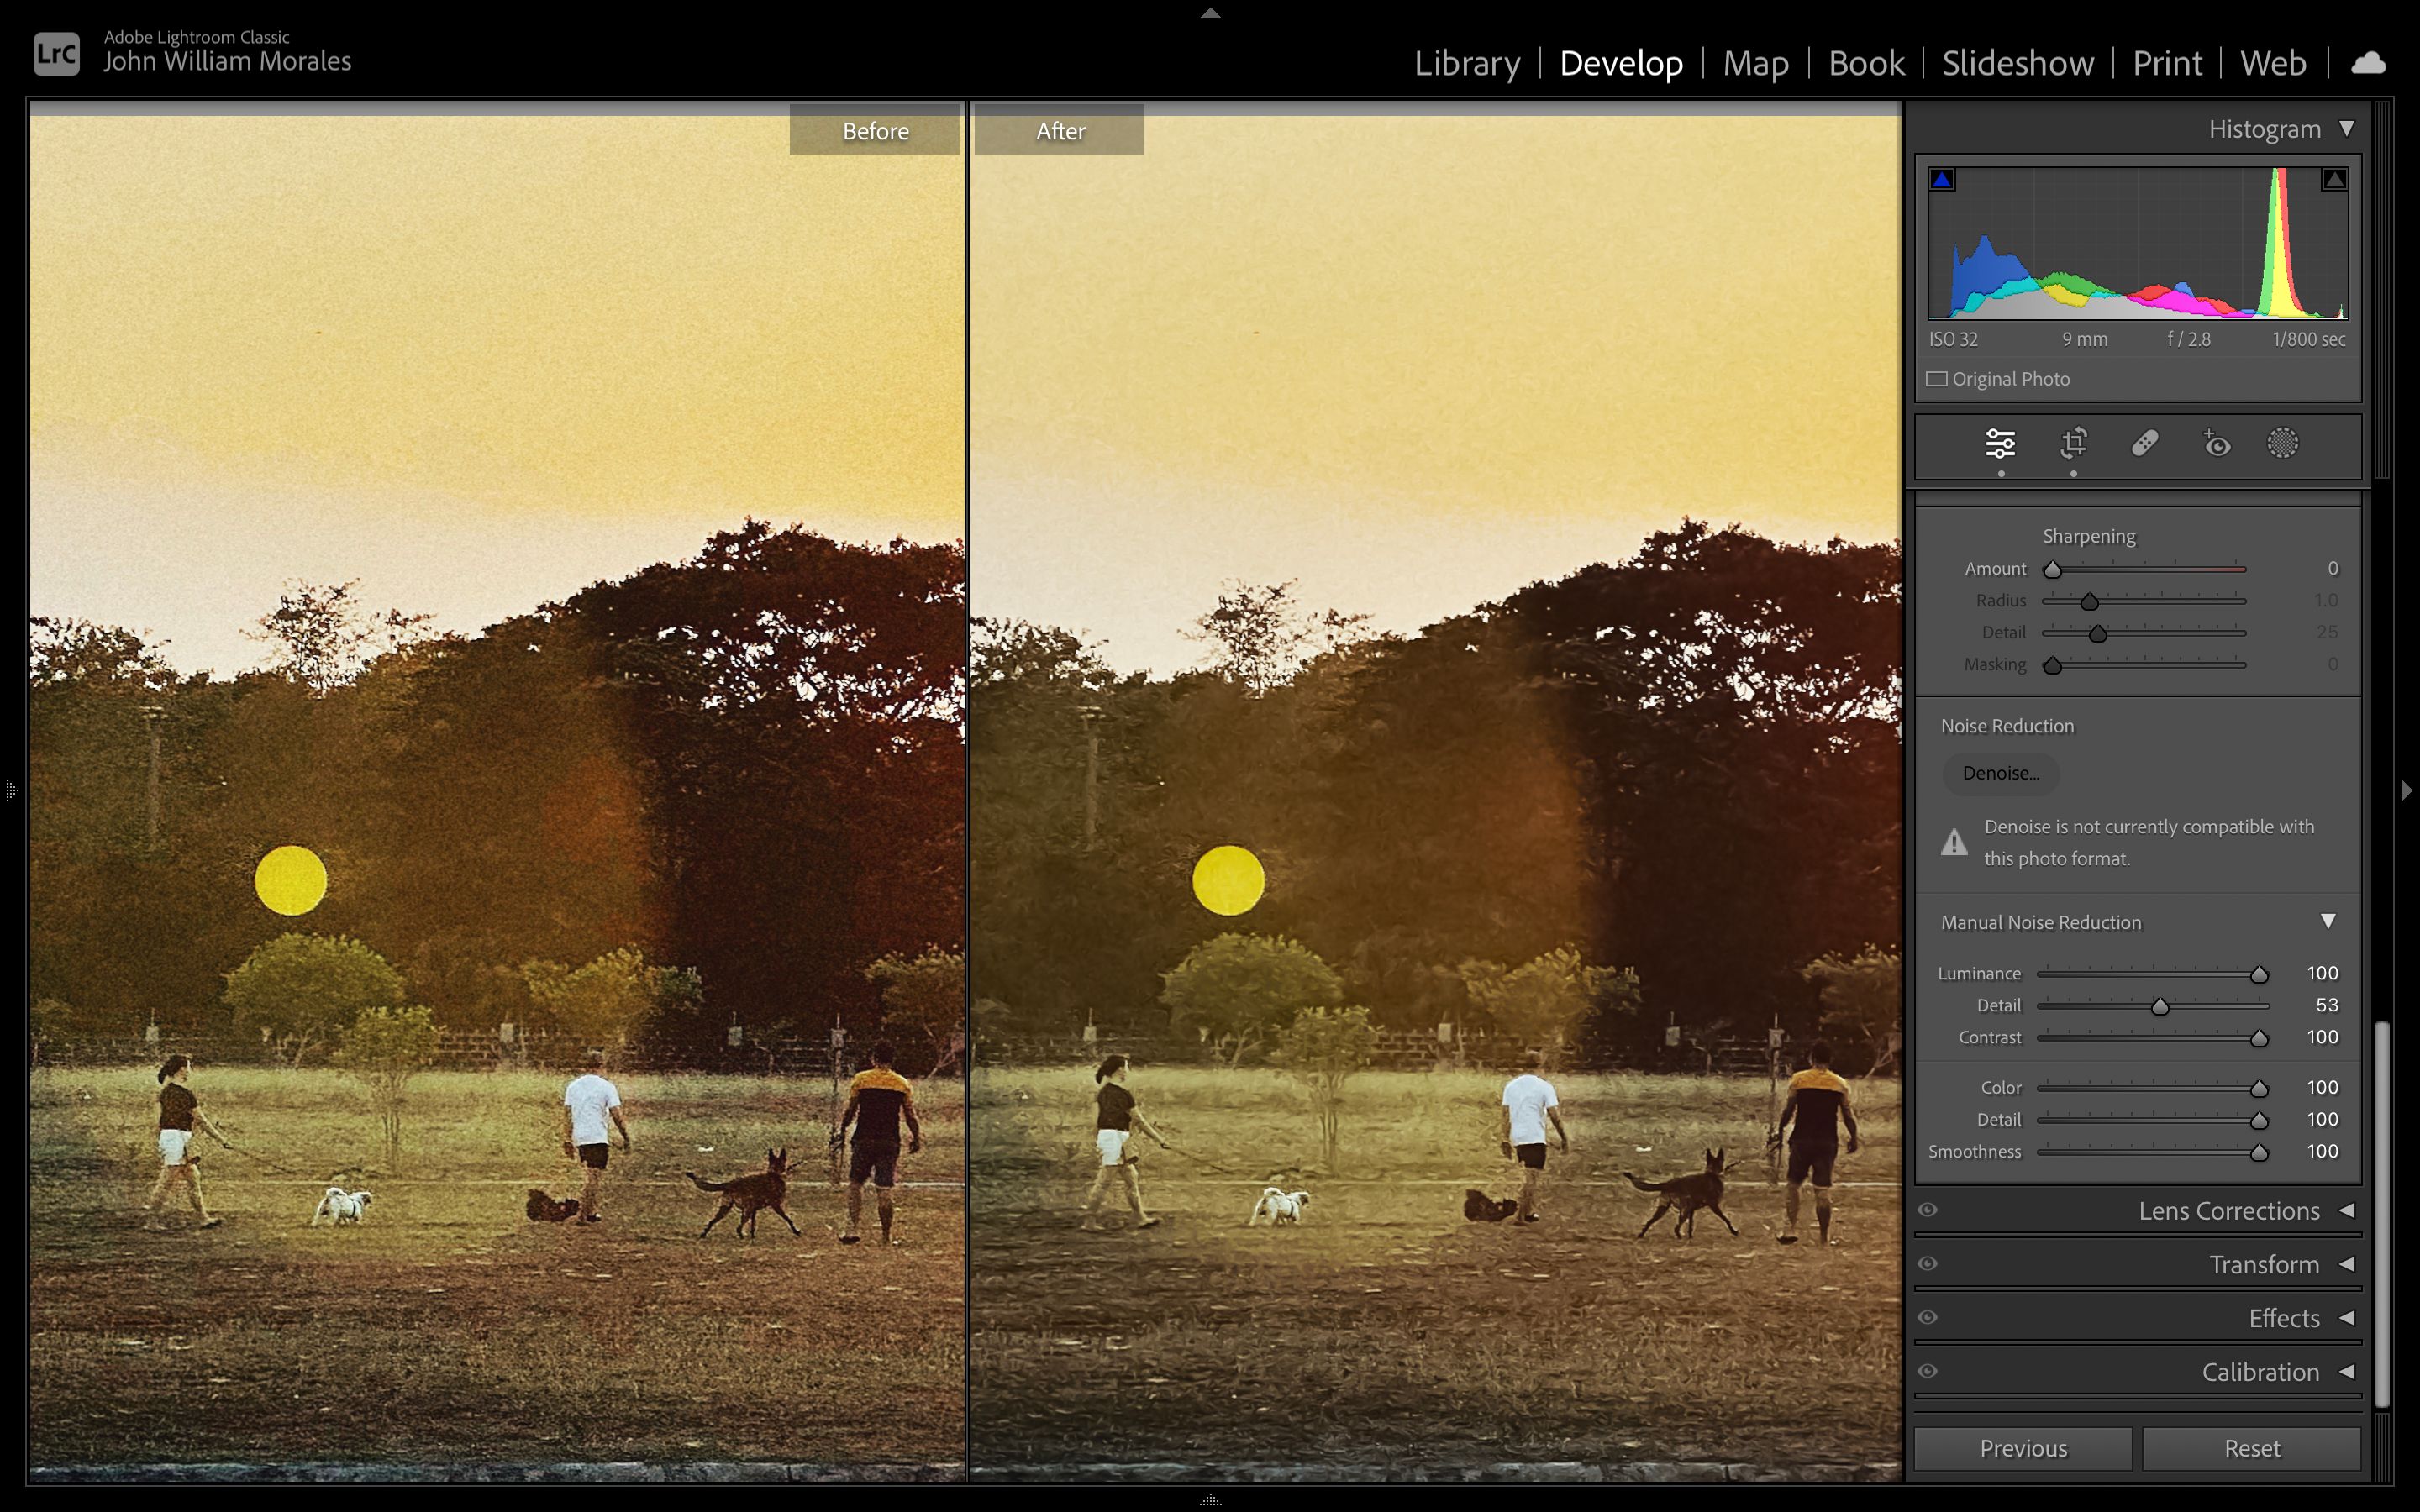
I’m not a big fan of noise reduction, as it can make images soft and mushy. However, they can be used in moderate amounts to improve an image. You should avoid using it where there’s text, faces, and fine details, as it’ll smoothen those out.
Portrait shots, wildlife, landscapes, and the like can all benefit from noise reduction, so long as you don’t overdo it. You can use noise reduction in Photoshop or Lightroom, but AI solutions like Topaz DeNoise also exist and are rapidly improving as well.
5. Use a Camera With a Larger Sensor
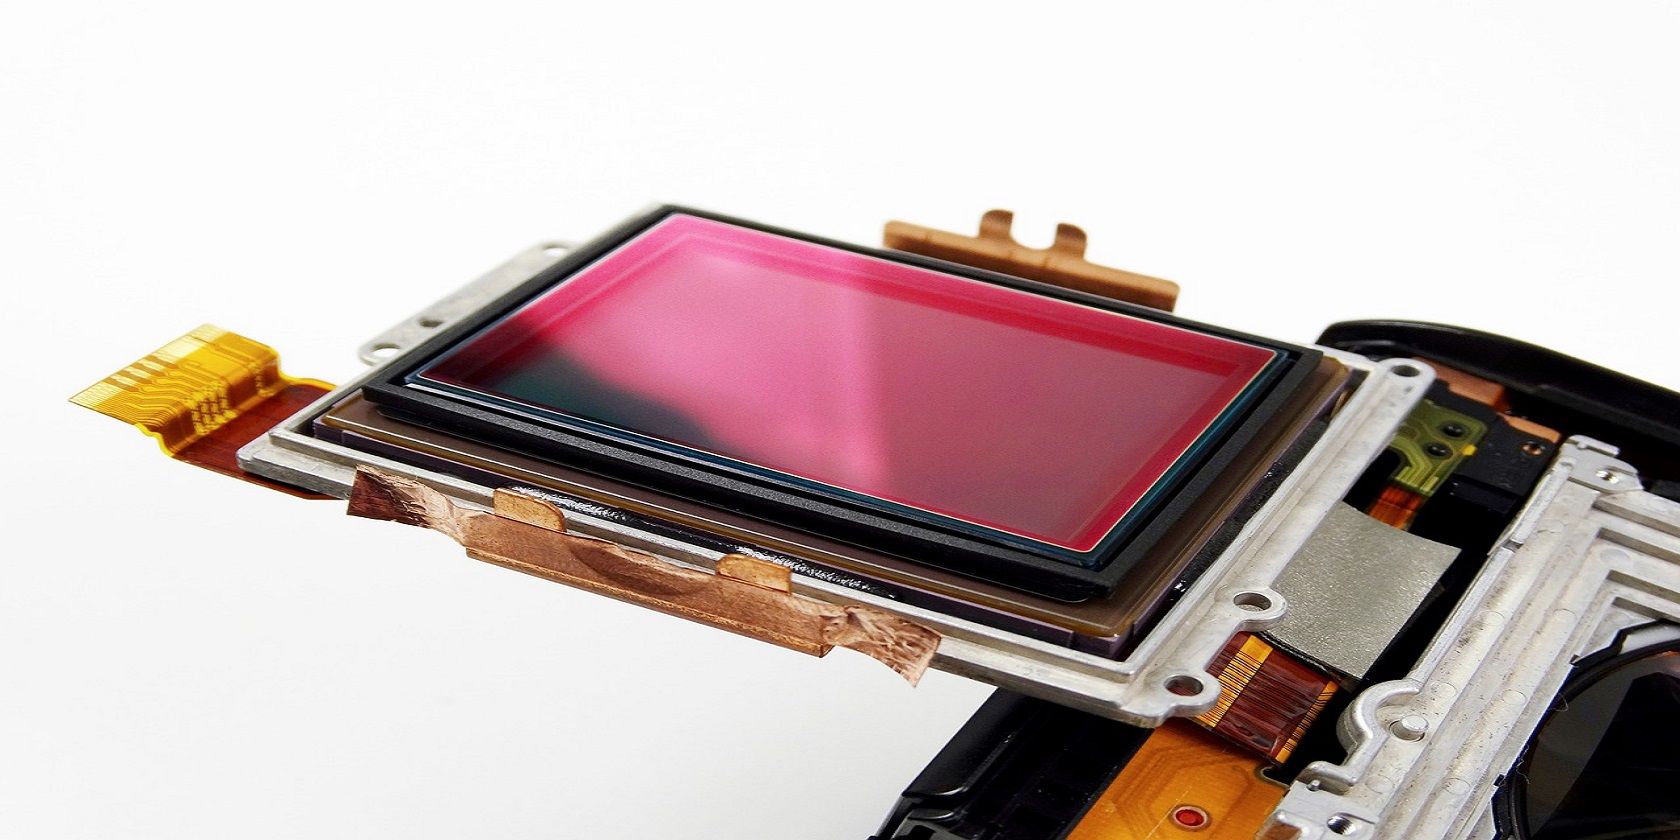
A larger sensor can gather more light, meaning more signal strength to overpower the ambient noise in the system. You generally have more freedom with large sensors in terms of noise, as you can run a lower ISO, a higher aperture, and faster shutter speeds all because of the increased light capture area.
If you want to capture more depth by increasing the aperture, you won’t want to increase your ISO by a lot to reduce the amount of noise, but you also won’t want to lower your shutter speeds or else you’ll end up with a shaky photo. You will still deal with these problems with a larger sensor, but to a lesser degree compared to cropped sensors.
However, we don’t suggest you make your purchasing decisions based on noise performance alone. There are far more things to consider when choosing between a cropped and a full-frame sensor.
Get Sharper Photos by Reducing Image Noise
Despite newer cameras having amazing noise performance, you’ll find plenty of amazing-looking photos taken with older cameras. When in the right hands, almost every camera has the potential to perform well and have minimal noise. Use this knowledge of signal-to-noise ratio to improve the clarity of your photos at your next photography session.
"avoid it" - Google News
November 04, 2023 at 01:30AM
https://ift.tt/rS79RXK
What Is Noise in Photography? 5 Ways to Avoid It - MUO - MakeUseOf
"avoid it" - Google News
https://ift.tt/3UqXFbW
https://ift.tt/k5SWQoJ



No comments:
Post a Comment